The MicroVAX 3500 was introduced in 1987 along with the MicroVAX 3600 as the higher end complement of the MicroVAX family. The new machines featured more than three times the performance and twice the memory capacity of the MicroVAX II. 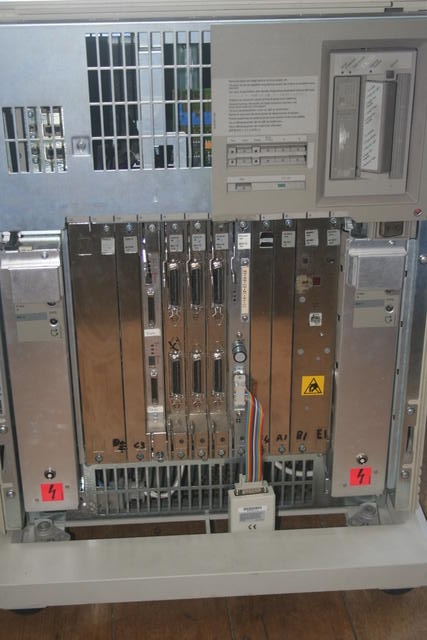 The MicroVAX 3500 (essentially the same as the VAXserver 3500) uses a KA650 CPU and comes in a BA213 chassis which contains a 12-slot backplane wired Q/CD. This means that QBus runs over the top two connectors and the bottom two are the C/D interconnect. QBus cards must be installed using the top two connectors - cards installed in the bottom wont function. I currently have two of these machines. LHN is pictured to the left with its front cover removed. My other is named AKV and came to me in rather poor condition. CPU Cover Panel Controls Break Enable/Disable Switch
| |||||||||||||||||||||||||||||||||||||||||||||||||||||||
| Switch Position | Function | |
| Dot outside circle (down) |
Break disable (factory setting). With the switch in this position, pressing the break key has no effect on the system. On power up or after a reset, the system attempts to boot the operating system |
|
| Dot inside circle (up) |
 |
Break enable. With the switch in this position, pressing the break key on the terminal halts the CPU. Additionally, after power up or after a reset the system will go into console I/O mode after the self-tests have completed. |

Powerup Mode Switch
| Switch Position | Mode | |
| Human Profile |
 |
Language inquiry. If the terminal supports multinational character sets, the user is prompted for language on every powerup and after a reset. Full startup diagnostics are run. |
| Arrow |
|
Run (factory setting). The user is only prompted for language on powerup and after reset if the battery backup unit has failed. Full startup diagnostics are run. |
| T in a circle |
 |
Test mode. ROM programs run wraparound serial line unit tests. A loopback connector is required. |
LED Display
The LED display shows the powerup tests. If you powerup a VAX with no console attached and the screen counts down to 3 then the machine is probably OK (it means its in Console I/O mode). It counts down to 0 when it has booted.| Code | Description |
| F | Waiting for CDOK |
| E | Start executing ROM firmware code |
| D | Waiting for Power OK |
| C | SSC and ROM tests |
| B | CPU tests |
| A | FPA tests |
| 9 | Memory management chip tests |
| 8 | Memory tests |
| 7 | Qbus tests |
| 6 | Console loopback/QDSS tests |
| 5 | Cache tests |
| 4 | Misc. tests running |
| 3 | Console I/O mode |
| 2 | Searching for bootstrap device, control passed to VMB |
| 1 | Bootstrap device found, control passed to secondary bootstrap |
| 0 | Program I/O mode, control passed to operating system |
Battery Backup Unit

After a time, this battery may begin to leak (pictured right, click for larger image). The BBU in my first MicroVAX 3500 (AKV) has made quite a big mess behind the CPU cover panel as you can see. The one on my second MicroVAX 3500 (LHN) appears to have failed (doesn't keep time) but has not yet started leaking. I have removed both to prevent any further or future damange.
The system actually runs just fine without the battery. The only problem is it wont remember the time and language selection.
Links and Documentation
- Scanned Documentation from LHNs binder
- Console Help (from a KA655 CPU)
- Information from Compaq (HP)